If you’ve been around music for any period of time, you will have heard people joke about the fact that so many songs tend to re-use the same handful of chord progressions over and over again. Well, there’s a good reason for that! They’re catchy, effective and a great place to get started when it comes to making your own music. Fingerpicking on the guitar very much follows suit.
Sure there are hundreds of sophisticated picking patterns you can incorporate into your playing, but most popular music tends to stick to a handful of common picking patterns because they’re comfortable to play and sound great.
With this in mind, today we’ve put together a list of 6 essential fingerpicking patterns for beginners or those just getting started learning fingerpicking guitar.
Before We Get Started
Whether you’re a beginner or have been playing for a while and are just looking to brush up on your technique, the exercises below will help you in a myriad of ways from improving thumb and finger independence, forearm dexterity, and timing.
Don’t worry about playing these fast.
Start off by playing each one slowly (ideally with a metronome set to a BPM that’s comfortable for you) and then begin to speed up as you gain confidence while maintaining good technique e.g. using the correct fingers for the correct strings, and maintaining your hand position.
And, if you need to brush up on your fingerpicking technique click any of the links below:
Pattern 1: Simple Ascending/Descending

While perhaps not musically interesting, the purpose of pattern 1 is to introduce thumb and finger independence, by assigning the thumb to the A (5th string), and D (4th string) strings and your index and middle finger to the G (3rd string) and B (2nd string) treble strings.
In this simple pattern and the remaining patterns to follow, the thumb makes contact with the bass strings using downstrokes, while the remaining fingers play the strings using upstrokes.
Keep in mind the picking pattern is the primary focus here, not so much what the fretting hand is doing.
In the example tab above, the chord shape is E Major, played on the 1st and 2nd fret and incorporating an open B string, but be sure to apply this pattern to other chord shapes as well. It works particularly well with A/Am and D if you move the entire pattern up a string and play strings 3 – 6 instead of 2 – 5. Once you feel confident try moving between E Major and A minor, just keep the thumb assigned to strings 4, 5, and 6.
Pattern 2: The “Inside Out”

Next up we have a fingerpicking pattern that’s a little bit more musical, but also carries with it a small increase in difficulty.
The general idea is that you have a 4-note sequence that repeats, in order of A (5th), G (3rd), D (4th), and B (2nd).
We play the A string with our thumb, the G string with our index finger, then the D string with our thumb, and finally the B string with our middle finger.
If we name our thumb/fingers in order of 1 2 3 4 with 1 being your thumb and 4 being your ring finger, you’d be playing the sequence 1, 2, 1, 3

If new to fingerstyle guitar, this is going to feel quite unnatural at first. But it’s also an opportunity to become familiar with the concept of muscle memory. Even if you find your fingers stumble over this at first, keep going and play the pattern as slow as you need to in order to get it right.
Over time, and with a healthy amount of patience, you’re going to become comfortable playing it.
This is an important lesson to learn as next time you’re presented with something even more challenging, like pattern 3 coming up, you won’t feel discouraged if at first, you stumble. Be safe in the knowledge that with some time and practice you can play even the most complex fingerpicking patterns.
Pattern 3: Two Notes at a Time

So far we’ve only covered single-note patterns, which means we’re only ever playing 1 note at a time.
But as you move into more challenging material you’ll find multiple strings being played, either at the same time or between an alternating bass line played with the thumb, on the offbeat, which we’ll get to shortly.
This pattern, aside from being popular in genres such as pop or country, is a nice first step that will help you become more accustomed to playing multiple strings at once.
Keeping the concept of ‘PIMA‘ in mind, we’ll play this pattern with our thumb on the D string, index finger on the G string, and both your middle and ring finger to pluck the B and E strings.
Getting the right kind of ‘tone’ out of the guitar is also important when incorporating additional strings. A good general rule is that when you pick the two highest notes you are picking up and away from the guitar. Not up and towards your chin.
Pattern 4: Bass and Melody

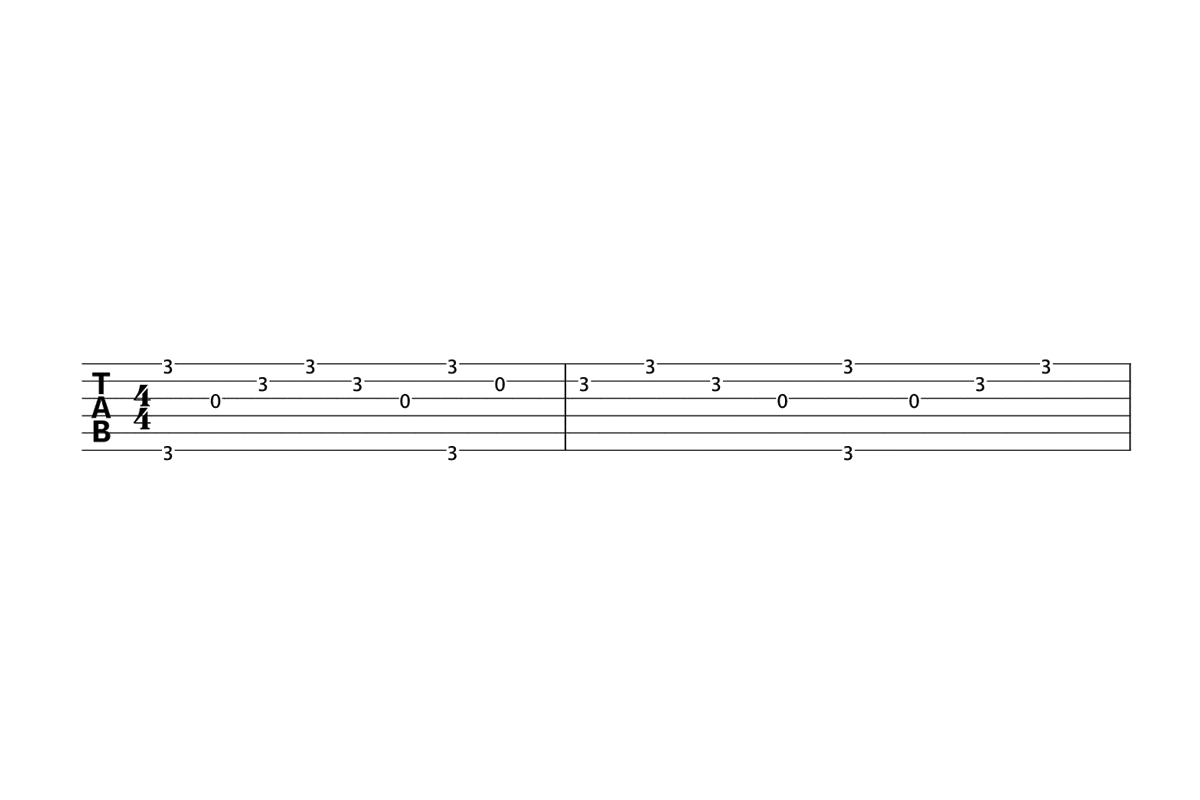
In keeping with the vibe of the previous pattern where we were required to play two notes simultaneously, this one is similar in so much as there are two notes played together, but here they are divided so we can hear a distinct bass note playing a steady rhythm on the low E string while the upper strings play a 6 note melody.
To play this you will “Pinch” the G notes on both your low and high E strings using your thumb and ring finger. Then proceed to finish the upper melody using your index G (3rd), middle B (2nd), and ring finger E (1st).
This basic pattern is about as simple as you can make while incorporating the “Pinch Technique“, but it’s a really useful one to learn as it warms you up to the idea that your thumb can operate independently of your fingers.
These basslines do get far more complicated too so be sure to practice using that thumb!
Pattern 5: Climbing

The easiest way to think about a pattern that slowly climbs up the strings like this is to think about the smaller ‘chunks’ that repeat within it.
So in the case of this exercise, it’s climbing in groups of 3, and each time that 3-string pattern repeats it does so on the next string above it. Giving it a sequence of 123 – 234 – 345 – 456.
When approaching it this way you only have to tackle 3 notes which is much easier to focus on. Be sure to play the bottom three strings with your thumb while maintaining a consistent rhythm.
This is a really helpful pattern to learn because as you climb up the strings, you will need to focus on using the correct fingers. It can be especially tempting to bring the thumb up for the last three notes, playing the 1st fret note on the G string.
The sooner you can get used to this motion the better!
Pattern 6: Introduction to Sequencing

Finally, we’ll introduce a slightly more sophisticated pattern with this 5 note sequence.
When we say “sequencing” we basically mean messing with the order of the notes to break out of the simple up and down linear lines used in the previous examples.
This can include skipping strings, odd note groupings, or anything that shakes things up and makes it more interesting.
In this example, we are playing a 5 note repeating pattern that starts off using your ring finger on the B (2nd), followed by your thumb on the low A (5th), then back to your ring finger before finally ending with 3 ascending notes, of which that final one is the first note of the next sequence of 5.
Confused yet? Don’t worry, look at the bar and think of the number ‘5’, you’ll soon see where the pattern ends and repeats.
This is just the very very tip of the iceberg when it comes to more complicated sequences and patterns you can come up with when fingerpicking.
Final thoughts
If you go through each of the patterns above you’re going to build yourself a foundation that will allow you to explore more complex fingerpicking arrangements.
Of course, there is an almost infinite amount of sequences of varying lengths and complexity you’re going to encounter during your progression on the guitar.
If you are wondering, what next? I recommend Tommy Emannuel’s “Fingerpicking Milestones” course on Truefire, just click the link above. It’s an in-depth guide to fingerpicking, going through the basics from choosing the right guitar, to perfecting your technique, and learning songs and exercises. Who better to learn from than arguably the best fingerpicker in the world.


