Cleaning your acoustic guitar is an often overlooked but important maintenance task that will help you to get the very best out of your instrument. In the following article, In the following article, I’m going to demonstrate how to clean an acoustic guitar, and provide some essential maintenance tips you can use to keep your guitar in great shape. But if you don’t have time t read the entire article, below is a quick summary:
Before cleaning your acoustic guitar wash your hands. Next, wipe down the guitar using warm water and a soft cloth, or use a guitar cleaning kit. If the guitar is particularly dirty use lighter fluid (Naptha). It’s an effective cleaning agent and won’t damage Nitrocellulose or Polyurethane finishes. You should also consider using a fretboard conditioner to prevent the neck from drying out.
For a more detailed guide continue reading below.
Preparation
The Workspace

Before you get started make sure you have access to an area you can easily work in without being too cramped. The probability of bumping the guitar or dropping something directly on it from above is much higher when working in a confined space.
Protecting the Guitar
There’s nothing more counter-productive than going to the effort of cleaning and maintaining your guitar, only to damage the guitar during the process.
This can be avoided provided there is nothing that can potentially scratch the guitar on the bench or table you are working on or contained with the cleaning products e.g. dry cloths you use.
Be sure to support the neck so the guitar can’t slide about. You can purchase neck rests for as low as $20. I personally use and recommend the Puxing Guitar Neck Rest Support Pillow. although the MusicNomad Cradle Cube is also a popular option.

You should also ensure any cloths, rags, etc. you apply directly to the guitar don’t have any residues that may harm the finish of the guitar. The last thing you want to do is clean your guitar with a cloth that contains thinners.
Beginning the Cleaning Process
The buildup of dirt, sweat, and assorted grime on your guitar affects different parts of the guitar differently. With this in mind, cleaning an acoustic guitar can be broken down into three steps:
- Cleaning the Fretboard
- Cleaning the Finish (Body and rear of the neck)
- Cleaning the Hardware (Tuners)
We’ll start with arguably the most important, the fretboard.
How to clean an acoustic guitar’s fretboard
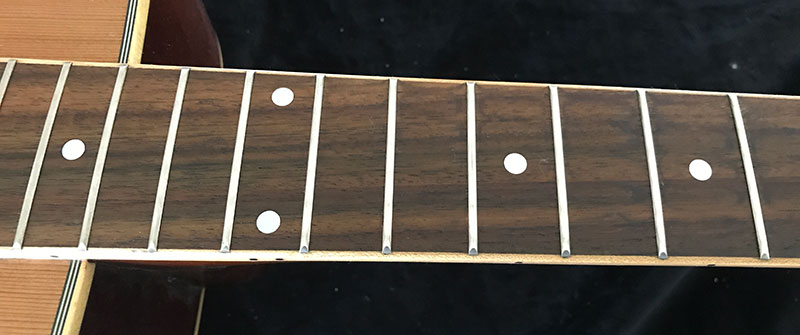
Chances are, especially when dealing with acoustic guitars, that your fretboard will be constructed from Rosewood or Ebony, along with your bridge.
If this is the case, the timber will be unsealed e.g. there isn’t a protective finish applied, and as a result dirt, sweat and grime can build up and cause damage.

Rosewood is less common than it once was due to export restrictions but many of the alternatives e.g. engineered or composite materials benefit from the same techniques used to clean rosewood.
Alternatively, if your guitar’s fretboard is made from maple (uncommon on acoustic guitars), it will be sealed and therefore will not be as susceptible to drying, however, it will still benefit from a wipe down, to improve playability.
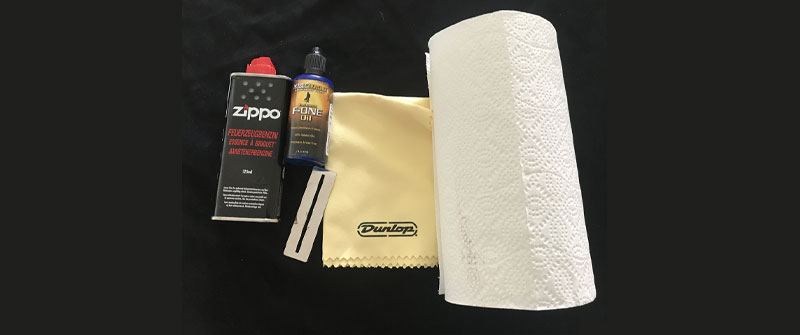
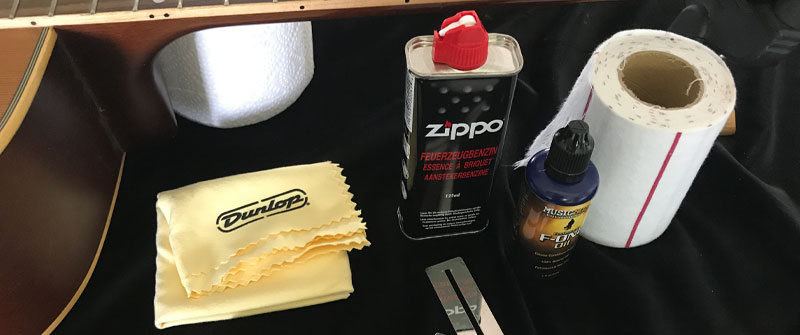
Tools Required

- Clean rags or microfiber cloths
- Paper Towel
- Solvent (Lighter fluid e.g. Naptha is best but is also flammable so take care)
- 0000 Steel wool (always use the finest grade available)
- Fretboard Conditioner / Lemon Oil (Do not use furniture grade, only use a cleaning agent made for guitars).
How Fretboards Get Damaged
Eccrine glands produce sweat. We have these all over our body e.g. under our arms, on the soles of our feet, and importantly in terms of playing the guitar, on the palms of our hands.
When our hands touch the guitar strings sweat, along with dead skin cells and other wonderful stuff, is transferred directly to the fretboard and will begin to accumulate near the fret wires.
This residue also builds upon the strings and affects the tone and responsiveness of the guitar, not to mention the life of your strings.
Sweat is essentially water and sodium (along with proteins, urea, and ammonia ). As the moisture content evaporates the sodium (salt) remains and begins drying out the timber and causing corrosion of the metal fret wires.
This affects the timber’s ability to expand and contract and accelerates the deterioration of the timber. This process is known as dry rot.
Over time, this can result in loose frets as the timber near the fret wires deteriorates and in some cases leads to cracking of the fretboard.
To address this issue, the fretboard must be kept clean from contaminants and conditioned to prevent the timber from drying out.
Step 1) Wash your hands
Anytime you touch a guitar ideally you should wash your hands first. This will reduce the amount of sweat and grime that would otherwise be transferred to the fretboard.
Step 2) Remove the Strings
Secondly, remove the strings. When cleaning a guitar, it’s a great time to perform a string change.
I like to simply loosen the tuning pegs and then clip the strings near the bridge using pliers. I’ll then use a bridge pin tool (usually found on a string winding tool) to carefully lift the bridge pins out and remove the ball ends.
Once this is done, you can unwind the strings from the tuning pegs and discard them.
Step 3) Clean the Fretboard
I recommend using the bare minimum concerning cleaning products, at least to begin with e.g. avoid using scrapers or solvents unless you absolutely have to perform deep cleaning.
While rare on acoustic guitars, if you happen to be cleaning a maple fretboard avoid using anything that may potentially damage the finish. In most cases, a dry cloth and warm water will do the job just fine.
I like to start by applying a very small amount of warm water directly to a clean cloth. The moisture helps loosen and lift the grime. This should be followed by wiping down the area with a paper towel.
I prefer paper towels as they are more abrasive than cloth. Because of this, they are more effective at removing gunk and build-up on the guitar. They also absorb the remaining moisture content on the surface of the fretboard. A Toothbrush can also be a good option if the gunk is proving difficult to remove.
Start by working on a small section of the neck at a time, before moving on.
Step 4) Using Solvents and Scraping
If the grime on the fretboard is proving difficult to remove you may need to apply a solvent to loosen further and then use a scraper to manually scrape the build-up of gunk and grime away.
This is often the case if the neck hasn’t been cleaned before, or the owner of the guitar sweats prolifically.
Acceptable solvents to use are:
- Saliva
- Lighter Fluid
- Guitar Polish
- Mineral Spirits
Lighter fluid is particularly effective in my experience and won’t affect shellac, lacquer finishes (most common on acoustic guitar), nitrocellulose, or polyurethane finishes if you mistakenly get some on the body of the guitar.
Avoid these common household products
Do not under any circumstances use common wood polishes or nail polish remover (acetone). Both products contain ingredients that may potentially damage the finish of an acoustic guitar.
Once you have applied a small amount of solvent to the fretboard, let it sit for 60 seconds, so it is absorbed sufficiently, and then begin scraping away some of the heavier build-up. Pay attention to the fret wires.
I use a dedicated scraping tool for this job but an old credit card will also suffice. Be careful not to press too hard on the fretboard, despite Ebony and Rosewood being particularly dense timbers they are still susceptible to dents.
Step 5) Polish the Frets
Once you are satisfied with your results you can move on to polishing the fret wires.
For this task, we need to use fine-grade steel wool (0000 grade). When using steel wool, despite it being of a very fine grade, you should still move the steel wool in the same direction as the grain of the fretboard timber to prevent scratches.
You can also use a fretboard guard to protect the timber with even more surety (see below). These are inexpensive and can be purchased from specialist luthier supplies outlets.
Once you have rubbed the fret wires to a smooth finish consider following up with an eraser to remove any marks left behind by the steel wool.
You should always be careful when using steel wool on a sealed maple neck. Any polishing of the neck itself will result in your once glossy finish becoming a matte finish as the gloss is removed.

Once complete, carefully remove any remaining fibers left over from the steel wool to prevent scratches. This is especially important if you have a magnetic soundhole pickup as the fibers will be drawn to the pickup. I often use a small vacuum to ensure all fibers are safely removed.
Step 6) Condition the Fretboard

If you’ve used a solvent to remove build-up on your fretboard I recommend using a fretboard conditioner. Solvents tend to draw out the natural oils contained within the timber.
It’s also a good idea to use a fretboard conditioner (even if you haven’t used a solvent to clean the fretboard) every time you change strings to prevent the timber from drying out.
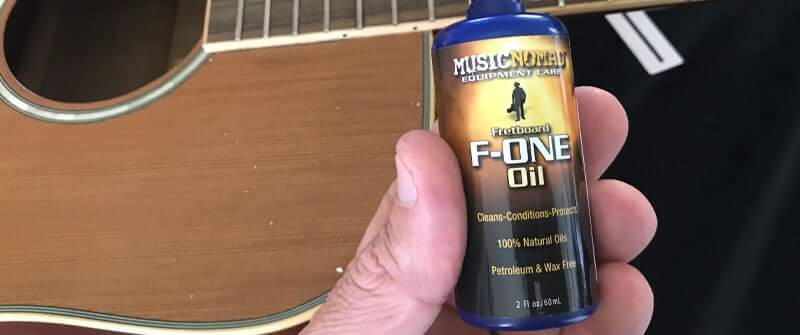
You can generally find fretboard finishing oils (most are linseed oil-based) in your local music store or online. You won’t require a great deal each time you apply it, so the bottle will typically last for years. Music nomad products e.g. F-One Oil (as pictured above) do a great job.
To apply your fretboard conditioner, wipe a very small amount directly on the fretboard using a dry cloth. Let it sit for 1- 2 minutes and then thoroughly remove all excess.
You can then polish the fretboard in its entirety using a clean cloth. And that’s it job done!
Cleaning and conditioning the bridge
The bridge is likely to be constructed from Rosewood or Ebony. So it’s a good idea to wipe down the bridge and apply conditioner as well.
How to clean the body of an acoustic guitar

Guitar finishes can become streaky and dirty over time. This is due to dirt, dust, sweat, and oils from your hands and arms becoming trapped under a thin layer of surface oil residing on the finish. Dust, including dead skin cells, will also begin to accumulate beneath the strings between the soundhole and the bridge and on the headstock beneath the strings.
This build-up of dirt and other abrasives increases the chances of the surface of the guitar becoming scratched when handled, and the longer it is left the more difficult it becomes to clean.
Tools Required
- Microfiber cleaning cloths
- Paper towel
- Solvent (lighter fluid e.g. Naptha is best but is also flammable so take care)
- Steel wool (fine grade e.g. 0000) if your guitar has a matte finish
- Fine grade sandpaper (e.g. 600 grit wet and dry) if the neck has a gloss finish
What finish is used on the body of the guitar?
Acoustic guitars are mostly finished using one of the following:
- Lacquer
- Nitrocellulose lacquers (commonly referred to as Nitro)
- Acrylic lacquer
- Water-based Lacquer
- Polyurethane Varnish
- Resin Varnish
- Acrylic Varnish
- Oil-based Varnish
- Shellac
Shellac is mostly used on high-end classical guitars. In most cases, acoustic guitars will be finished in Nitrocellulose Lacquer.
Although Polyurethane tends to dry harder and as a result offers better protection, many purists believe this affects the tone of an acoustic guitar negatively compared to Nitrocellulose Lacquer.
The list of finishes above is more informational than practical. If you can’t identify the finish of your guitar, don’t worry. It’s best to avoid using common cleaning agents in any case except the few I have listed below which won’t harm the finishes listed above.
Avoid common cleaning and polishing products
It is best to avoid using common cleaning and polishing products when cleaning the finish of your guitar. The most common finishing product used on acoustic guitars, Nitrocellulose Lacquer breaks down over time as the ingredients e.g. cellulose evaporates resulting in a thin and delicate finish.
Like cleaning and conditioning the fretboard, start with the bare minimum e.g. a dry paper towel, and only move on to using a cleaning product if required.
Acceptable products include:
- Naptha, Zippo
- Saliva
- Deionized Water
- Warm Water
- Dedicated Guitar cleaning products e.g.Colortone products sold by vendors such as StewMac.com
- Guitar Polish (avoid using abrasive automotive polishes)
Cleaning the body, much like cleaning the fretboard is a process. The steps below detail this process in the correct order.
Step 1) Inspect the Guitar
Before we begin cleaning the finish on your guitar body it is important to inspect the guitar for any exposed timber. Moisture can be absorbed which may result in swelling.
Look for places where the finish may have worn through or is chipped. Obviously, keep moisture well away from the internal cavity of the guitar body.
Step 2) Begin Cleaning
Bunch up a clean, dry cloth into a ball about the size of your fist and begin polishing a small section of the body, moving in a circular motion.
Inspect your efforts by first looking at the area you have worked on for any noticeable change and compare the remaining area of the guitar you have yet to polish.
Secondly, inspect the cloth you are using to see if any of the grime on the body of the guitar has been transferred to the rag. If none is present you may need to consider something stronger, in the form of a liquid solvent. If however, you are seeing improvements continue this process for the entire guitar.
Step 3) Using Solvents
Try using warm water first by moistening the cloth ball you have been using in the previous step. Just be sure not to use an excessive amount of moisture.
If after a second inspection of the area and cleaning rag you are not seeing any of the dirt and grime transfer to the rag try using Naptha which breaks down oils and can be more effective at removing dirt and grime if warm water is not cutting it.
Step 4) Polish the Guitar
Once you have removed much of the dirt and grime on the guitar body you can polish the guitar. Bear in mind, polishing with any type of polishing compound will affect the finish, and may cause it to soften over time as the product is absorbed into the finish.
I recommend a dry polish first to see if you can achieve a good result without using a polishing compound.
Start by polishing the surface using a tight circular motion and then removing any excess with an additional clean cloth. Continue inspecting the cloth for the transfer of grime and dirt.
Step 5) Using a polishing product
I only use polishing compounds to clean my guitars rarely. Generally, it is the mild heat (be careful if using a buffing machine for example) generated by the polishing motion that will tend to help remove much of the grime found on the body of the guitar. That’s right, rather than a dedicated polishing compound it mostly comes down to good old elbow grease.
If you do happen to use any form of guitar polishing compound start by polishing a small section of the guitar on a less prominent section and be sure to follow the manufacturer’s instructions carefully.
Step 6) Addressing the rear of the neck
Ensuring the rear of your guitar neck is smooth and silky aids playability.
A build-up of grime will cause the neck to feel ‘sticky’ and cause your hand to drag when moving up and down the neck.
If only addressing the rear of the neck it is advised to clean using a small amount of warm water followed by additional solvents as required.
But since we have already cleaned the body including the rear of the neck we can skip this step and move right to reducing the friction on the back of the neck using fine grade steel wool, or depending on the finish very fine grade sandpaper. Be careful, however, as it is essential to avoid sanding through the finish and exposing the raw timber of the neck.
Matte Finish
If your neck has a matte finish (non-gloss finish) it is best to use fine-grade steel wool and gently rub the rear of the neck in the direction of the grain, repeatedly testing until it feels smooth and silky and optimal for moving quickly over the neck.
Gloss Finish
If your guitar utilizes a gloss finish, use very fine-grade sandpaper e.g. 600 grit wet and dry. Just like using steel wool, sand with the grain, and regularly check your progress to avoid sand throughs.
Once you have completed this step you have completed cleaning the guitar body. That leaves us just one final step, cleaning the hardware.
How to Clean Hardware
Cleaning the hardware on your acoustic guitar, (unlike an electric guitar) is really just a case of cleaning the tuning pegs (spool and buttons) and the rear housing (if the tuners do not use exposed gears).

Why you should keep your tuners clean
Despite this being a minor job, it’s an important one as maintenance of your tuning keys will keep them in good working order longer and ensure the guitar maintains tuning stability over time. Depending on the state of your tuners, this may simply require a wipe down with a clean rag. However, you can also apply a metal polish (brass polish if your tuners are made from brass) which will leave a protective coating, preventing dust and other build-up, at least in the short term.
Step 1) Wipe the tuners down using a dry cloth
To remove dust and other particles, simply wipe the tuners down using a dry cloth. In most cases, this will be sufficient and your tuners will look greatly improved.
Step 2) (If required) Brush any debris from the gears
If the gears are exposed you may need to use an old toothbrush or brush to remove any dust that would otherwise affect the gears.
Step 3) Apply a metal polish
Add a small amount of metal polish (or brass polish) and polish the spool, button, and housing of the tuners.
While you should take care to avoid getting any polish on the headstock, in reality, provided you remove it quickly it won’t have a detrimental effect on the guitar’s finish.
Once completed, you can put on a fresh new set of strings and you will have successfully cleaned your acoustic guitar.
Summary
Cleaning your acoustic guitar may not be the most enjoyable way to spend time with your favorite musical instrument but it’s a job you should consider doing at least 1-2 times per year. It doesn’t require specialist tools, just basic products you have lying around the home. Remember, cleaning your guitar is not just about aesthetics, you can improve the playability of your guitar and reduce the chances of problems developing, that may result in expensive repair work in the future.


